Creating WebDAV Server with Azure AD Authentication
This article describes how to create a WebDAV server with Azure AD authentication and open documents using WebDAV Ajax Library from a web page.
The functionality described in this section requires WebDAV wizards for Visual Studio supplied with IT Hit WebDAV Server Engine for .NET v11+.
Creating an ASP.NET Web Application in Visual Studio
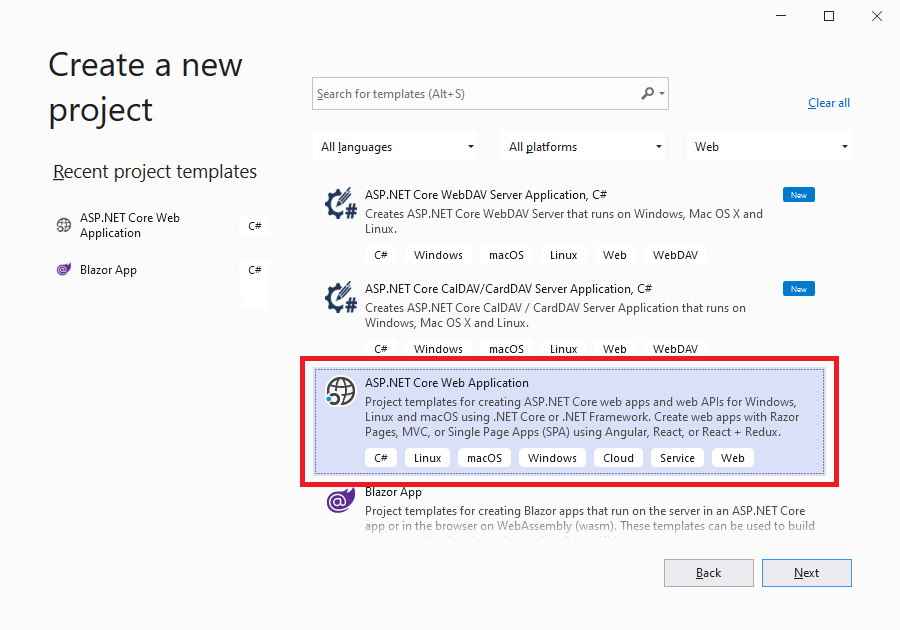
First, we will create an ASP.NET Core Web Application with Azure AD authentication. You can also choose the Blazor App project as well as you can select either the Razor project or the ASP.NET MVC project options.
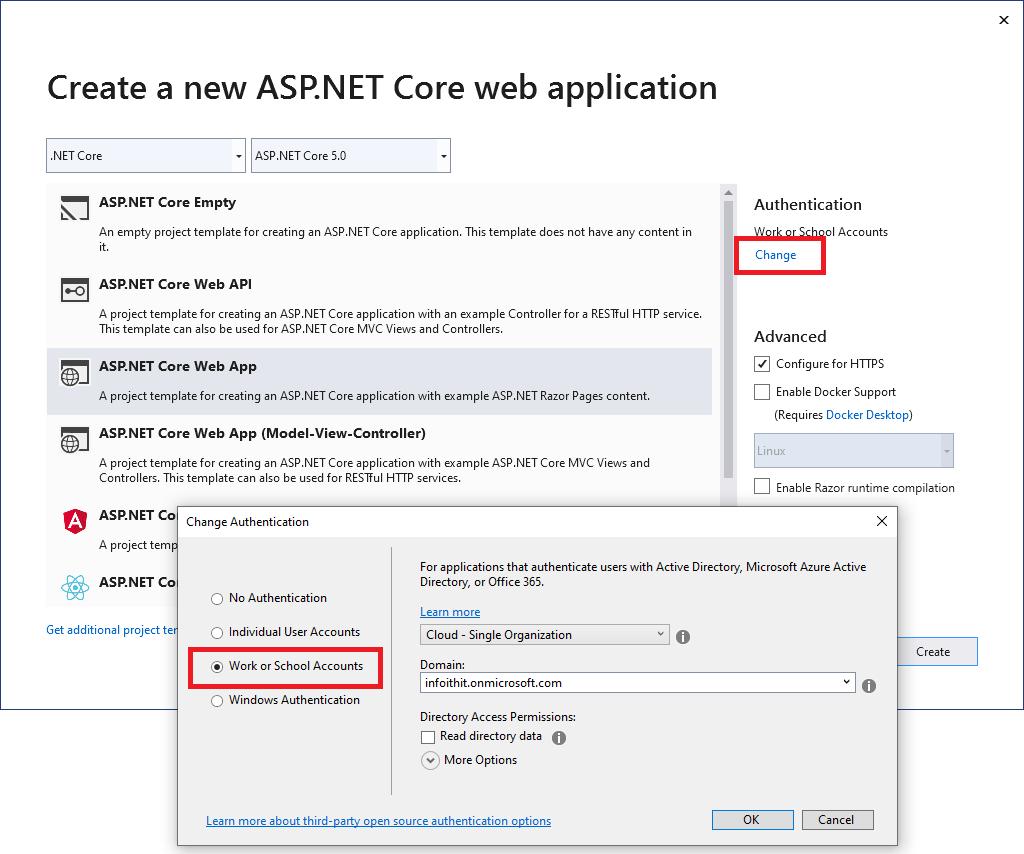
Select the Work or School account option. Fill-in the Azure AD settings.
Adding WebDAV with Azure AD and MS-OFBA Authentication
In this step, you will be using IT Hit WebDAV Server Engine for .NET wizards for Visual Studio to add WebDAV to your project. The WebDAV wizards are automatically installed with WebDAV Server Engine for .NET SDK.
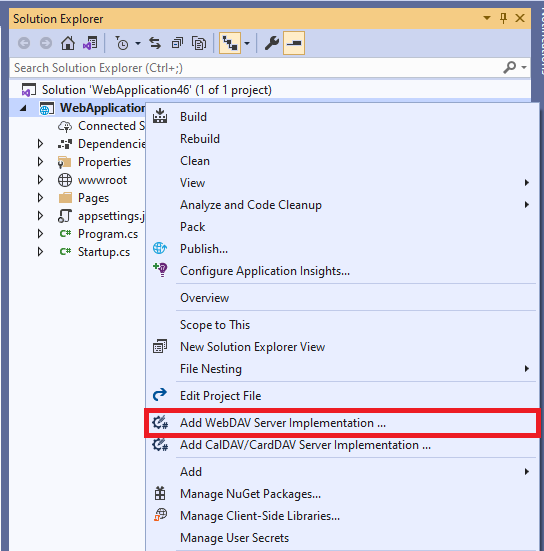
Select the "Add WebDAV Server Implementation" option in the project context menu:
You can keep all options to default except for the Authentication step. Select the "Cookies/Forms" option and check the MS-OFBA checkbox on the Authentication step:

Make sure to check the MS-OFBA checkbox! Microsoft Office applications will show an MS-OFBA HTML login dialog with Azure AD login web page in it.
Running Your Web Application
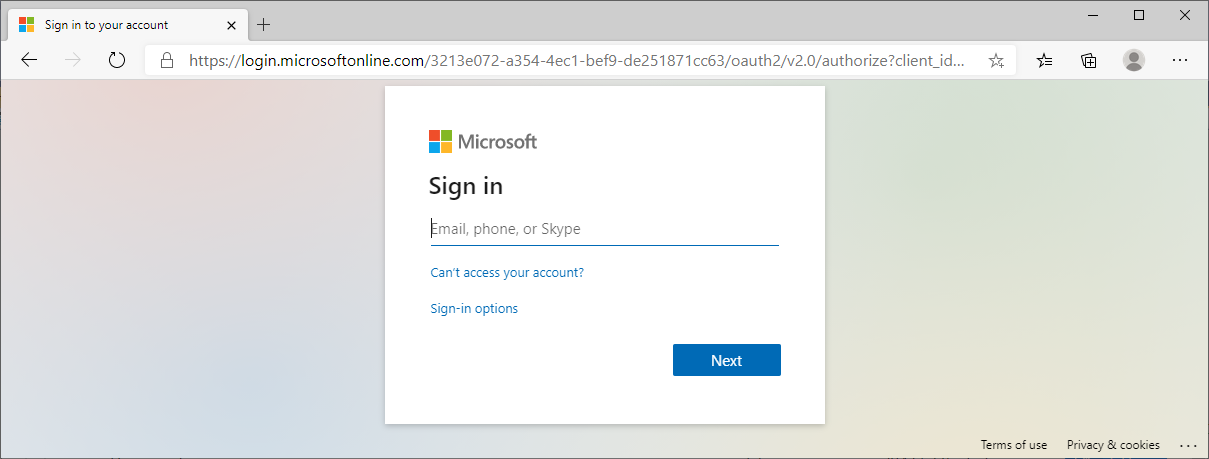
Run your web application. Note that WebDAV wizard has changed the default start URL in your application in Visual Studio, so you are redirected to your default WebDAV page specified in WebDAV wizard (/DAV/ by default) and then to the Azure AD log-in page:
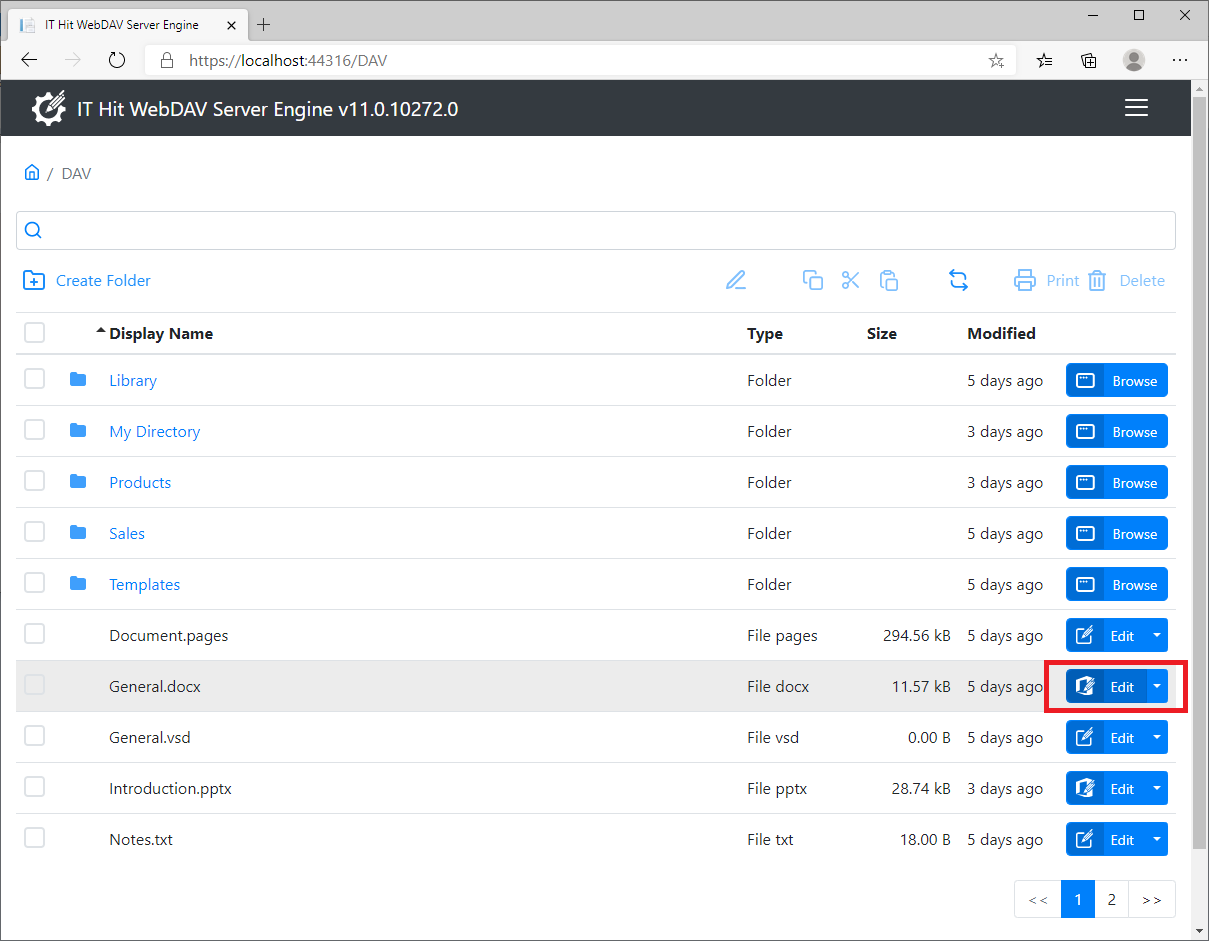
After logging-in with your Azure AD account, you will be redirected back to your default WebDAV page where you see the list of documents and folders on your WebDAV server.
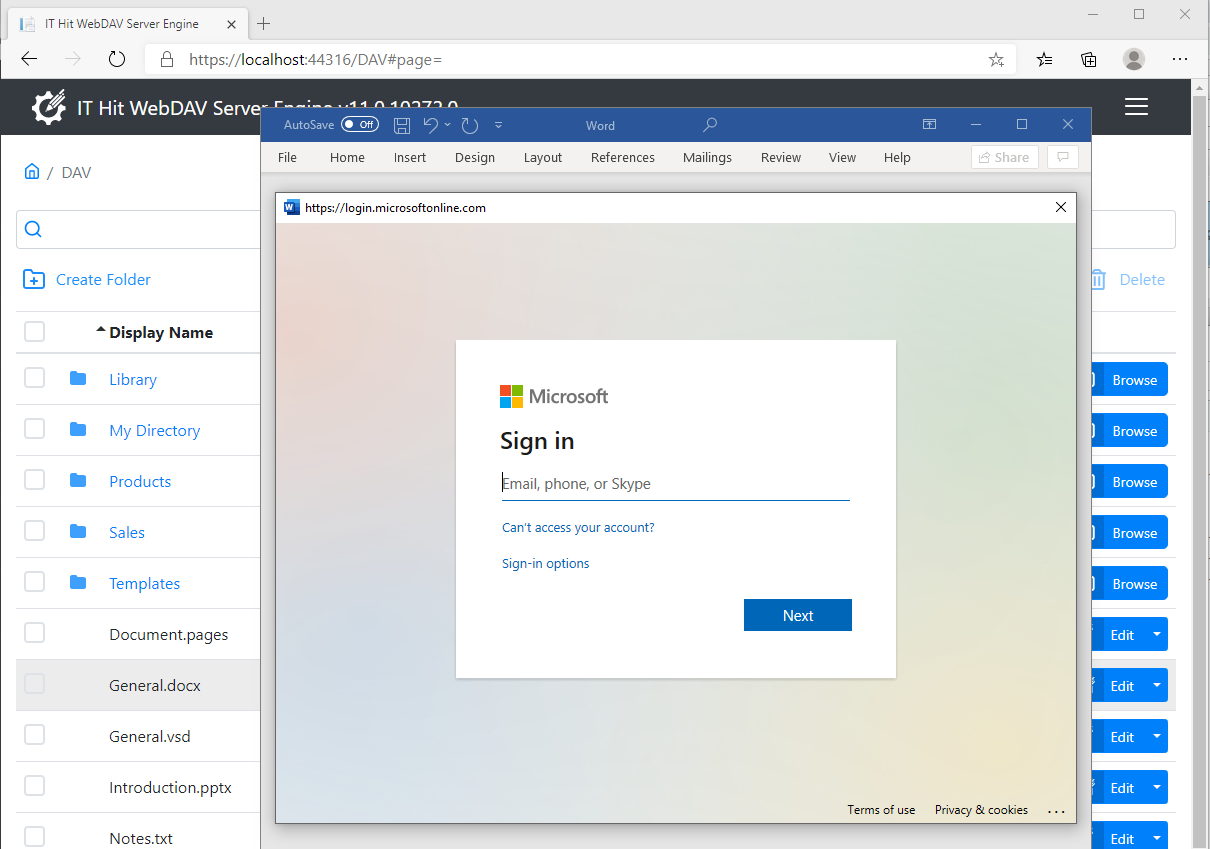
Select the Edit button on any Microsoft Office document. The Microsoft Office application will start immediately and show the MS-OFBA log-in dialog with AzureAD login page loaded in it:
The Microsoft Office application will show a MS-OFBA login page during the first document edit. This is because Microsoft Office is using Internet Explorer to render the HTML web page. Enter the login credentials:
The document is automatically locked when the document is opened (or when you select the "Enable Editing" in case of the Protected View is enabled) and saved directly to the server when you save it in the Microsoft Office application.
How Documents Opening Works
The Edit button, located on the MyCustomHandlerPage.aspx page, calls the MicrosoftOfficeEditDocument() JavaScript function (supplied with IT Ht WebDAV Ajax Library) that opens the document with Microsoft Office application. The MicrosoftOfficeEditDocument() function does NOT require the DavX protocol application and web browser extension supplied with WebDAV Ajax Library. Note that MS-OFBA is supported by MS Office applications only.
If you wish to open documents in the non-Microsoft Office application, you should NOT check the MS-OFBA option in the WebDAV wizard on the Authentication step. In this case, if no Basic/Digest/MS-OFBA checkboxes are selected on the authentication step, a pure cookies authentication will be used and the DavProtocolEditDocument() JavaScript function call will be inserted on the MyCustomHandlerPage.aspx page. The DavProtocolEditDocument() function requires the DavX protocol application and web browser extension to be installed and enabled on the client machine. You can find more about opening documents from a web page in this section.
To avoid the login dialog to be displayed on every document opening the wizard have set persistent authentication options:
// Enabling persistent cookies to avoid MS-OFBA login during every document access.
// If you need to access Azure resources using Azure AD token, you also need to extend
// the tokes lifetime as described in this article:
// https://docs.microsoft.com/en-us/dotnet/api/microsoft.aspnetcore.authentication.openidconnect.openidconnectoptions?view=aspnetcore-5.0
services.Configure<OpenIdConnectOptions>(OpenIdConnectDefaults.AuthenticationScheme, options =>
    {
        options.SaveTokens = true;
        options.Events = new OpenIdConnectEvents
        {
            OnTicketReceived = context =>
            {
                    context.Properties.IsPersistent = true;
                    context.Properties.ExpiresUtc = DateTimeOffset.UtcNow.AddDays(5);
                    return Task.FromResult(0);
            }
        };
    });
Loging-out of MS-OFBA
In some cases, typically for development purposes, you may need to log-out of the MS-OFBA. On Windows OS, Microsoft Office is using Internet Explorer to display the MS-OFBA log-in dialog and store cookies in the operating system. To log-out, you need to delete the authentication cookie from the system. Go to Internet Options -> General Tab -> Settings -> View Files, find and delete your authentication cookie. For example, for the development server running on localhost your cookie will look like the 'cookie:accountname@localhost/.